Depth values affected by spotlight
Camera: Intel D435
Firmware: 5-12-7-100
Situation: Given two objects A and B, where object A is a couple of centimeters closer to the camera than object B. Under normal light conditions, the depth values reported by the camera are coherent with this situation (depth values of object A are smaller than depth values of object B). Nevertheless, if object A slightly suffers by a spotlight to its surface, the depth values reported by the camera seem to be slightly affected. This could mean that the the depth values reported by the camera are not coherent (depth values of object A are larger than depth values of object B).
Do you have identified this kind of situation? Any advice to solve it?
Thank you in advance for the help.
-
It is an artificial light in the ceiling that illuminates more the surface of object A than the surface of object B. Some areas of the image illuminated by the spotlight seem to be quite saturated, but not enough for considering a bad or burned image.
By switching off this artificial spotlight in the ceiling (the global illumination keeps being enough), this weird effect in the affectation of the depths values of the area that is receiving the spotlight disappears and everything works fine.
-
If the spotlight is blotting out the texture of Object A and making it more difficult to read depth detail from, you could try using the camera's projector (its IR Emitter) to project a dot pattern onto the scene. The camera can use the dots cast over the surface of objects as a texture source to analyze for depth detail in situations where a surface appears to have low texture detail or no texture.
-
In the normal axis, object A is about 50 cm to the camera and object B is about 53 cm to the camera. In the vertical axis, object A is about 3 cm above object B.
The ceiling spotlight is behind the camera. Due to the spatial distribution, object A is receiving the spotlight in a more direct way than object B.
-
The problem is that in the context of the application where I am applying this, I cannot ensure or demand a specific location for the two objects because is something that I might not control. What I have observed is that when the objects A and B are positioned in a location that doesn't suffer from the direct spotlight, the behavior is coherent.
For me it is important to know if you strongly recommend that a direct spotlight shouldn't point to some of the objects in order to avoid this issue, because in that case I might re-think the boundary conditions of the application.
-
In some cases a strong light source can be useful for obtaining depth information. This includes dark grey / black objects that the camera may have difficulty observing, because dark objects absorb light. Projecting a strong light source onto such surfaces, such as a black office chair, can bring out depth that would not otherwise be available.
If a strong light source is projected onto a light colored object though then it can result in a pool of light that blocks out the detail of a surface, making it look like a plain white or black area on the camera image.
It may be worth performing depth to color alignment so that RGB pixels are mapped to the depth coordinates.
-
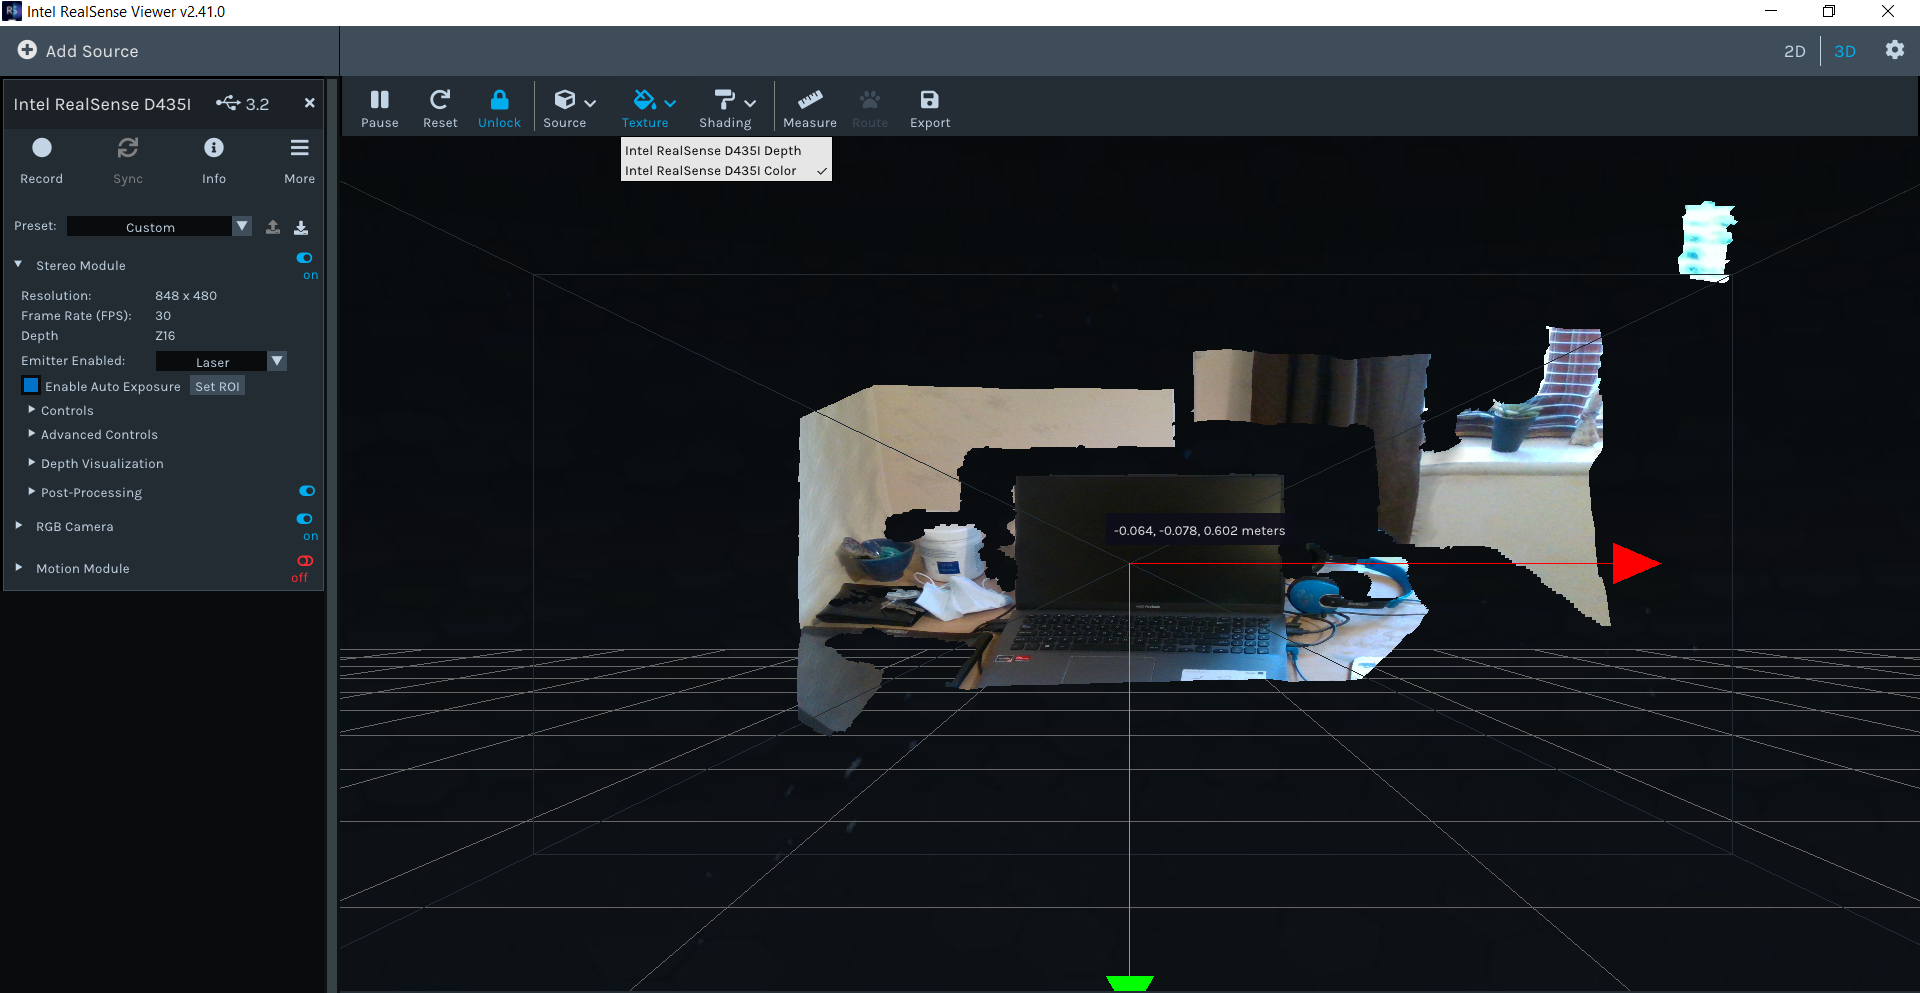
An easy way to test coordinate measurement with depth to color alignment without any programming is in the RealSense Viewer. If you go into '3D' point cloud mode in the Viewer, enable depth and RGB and then select the Color option from the Texture control at the top of the Viewer window then you can map RGB to depth. You can then move the mouse cursor over the image and read coordinates from each point.
The Measure option also enables you to use the mouse to drag out a line between two points on the image and receive a measurement value.
-
If the disturbance can be characterized as glare from light falling onto a reflective surface then the negative effect on the image could be significantly reduced by purchasing a physical optical filter called a linear polarization filter and applying it over the top of the lenses on the outside of the camera. Section 4.4 When to use polarizers and waveplates of Intel's white paper document about optical filters provides detail about this.
If you agree that it is glare from a reflection, might use of an external filter on the camera be an option for you?
Please sign in to leave a comment.
Comments
14 comments