Regarding D435 Object Scanning Limitations
Hi,
I'm trying to 3-D scan an object of size approx. 10cm * 10cm * 3cm which is circular symmetric using a turntable. The software which I've been using for this is RecFusion. I had two questions:
i) Is there any object limitations on the D435 because the 3-D scan is not accurate and not complete?
ii) Do I use any other software to get a more accurate 3-D scan? The problem which I've been facing is that the point cloud generated from the camera/software can't capture the depth differences between some parts because of occlusion. Is there any way to remove that?
Thank you!!
-
RecFusion is a tool that has been highly recommended by RealSense users who have tried it. It is not the only scanning solution that is compatible with the 400 Series cameras though. There is also DotProduct Dot3D:
https://www.intelrealsense.com/practical-3d-scanning-with-dot3d-pro/
and LIPScan 3D, which demonstrates use of the D415 camera model with a turntable in the video below:
https://www.youtube.com/watch?v=N14Pi6z-MkE
The D415 is better suited to small object scanning than the D435 and has better image quality. The D435 excels in applications where fast motion needs to be tracked or a wide field of view is required.
An occulusion removal filter was incorporated into the SDK by early 2018 via a class called occlusion_filter.
http://docs.ros.org/kinetic/api/librealsense2/html/occlusion-filter_8cpp_source.html
The occlusion filter can also be accessed through the RealSense Viewer by carefully following the steps below in order:
STEP ONE
Switch the Viewer from 2D mode to 3D point cloud mode using the '3D' button in the top corner of the Viewer.
STEP TWO
Start the RGB stream first before activating the Stereo Module stream.
STEP THREE
Start the Stereo Module stream.
STEP FOUR
On the 'Texture Source' drop-down menu at the top of the screen in 3D mode, change the default 'Depth' setting to 'Color'. This will cause the Occlusion Filter option to appear.

STEP FIVE
Left-click on the drop-down menu beside the 'Occlusion removal' option to change the default 'Off' setting to 'Heuristic' or 'Exhaustive'. In cases I have seen where other RealSense users have used this option, 'Heuristic' has been recommended.
-
Thank you for the info!
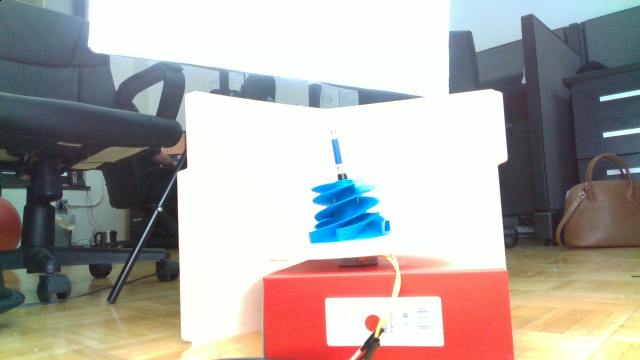
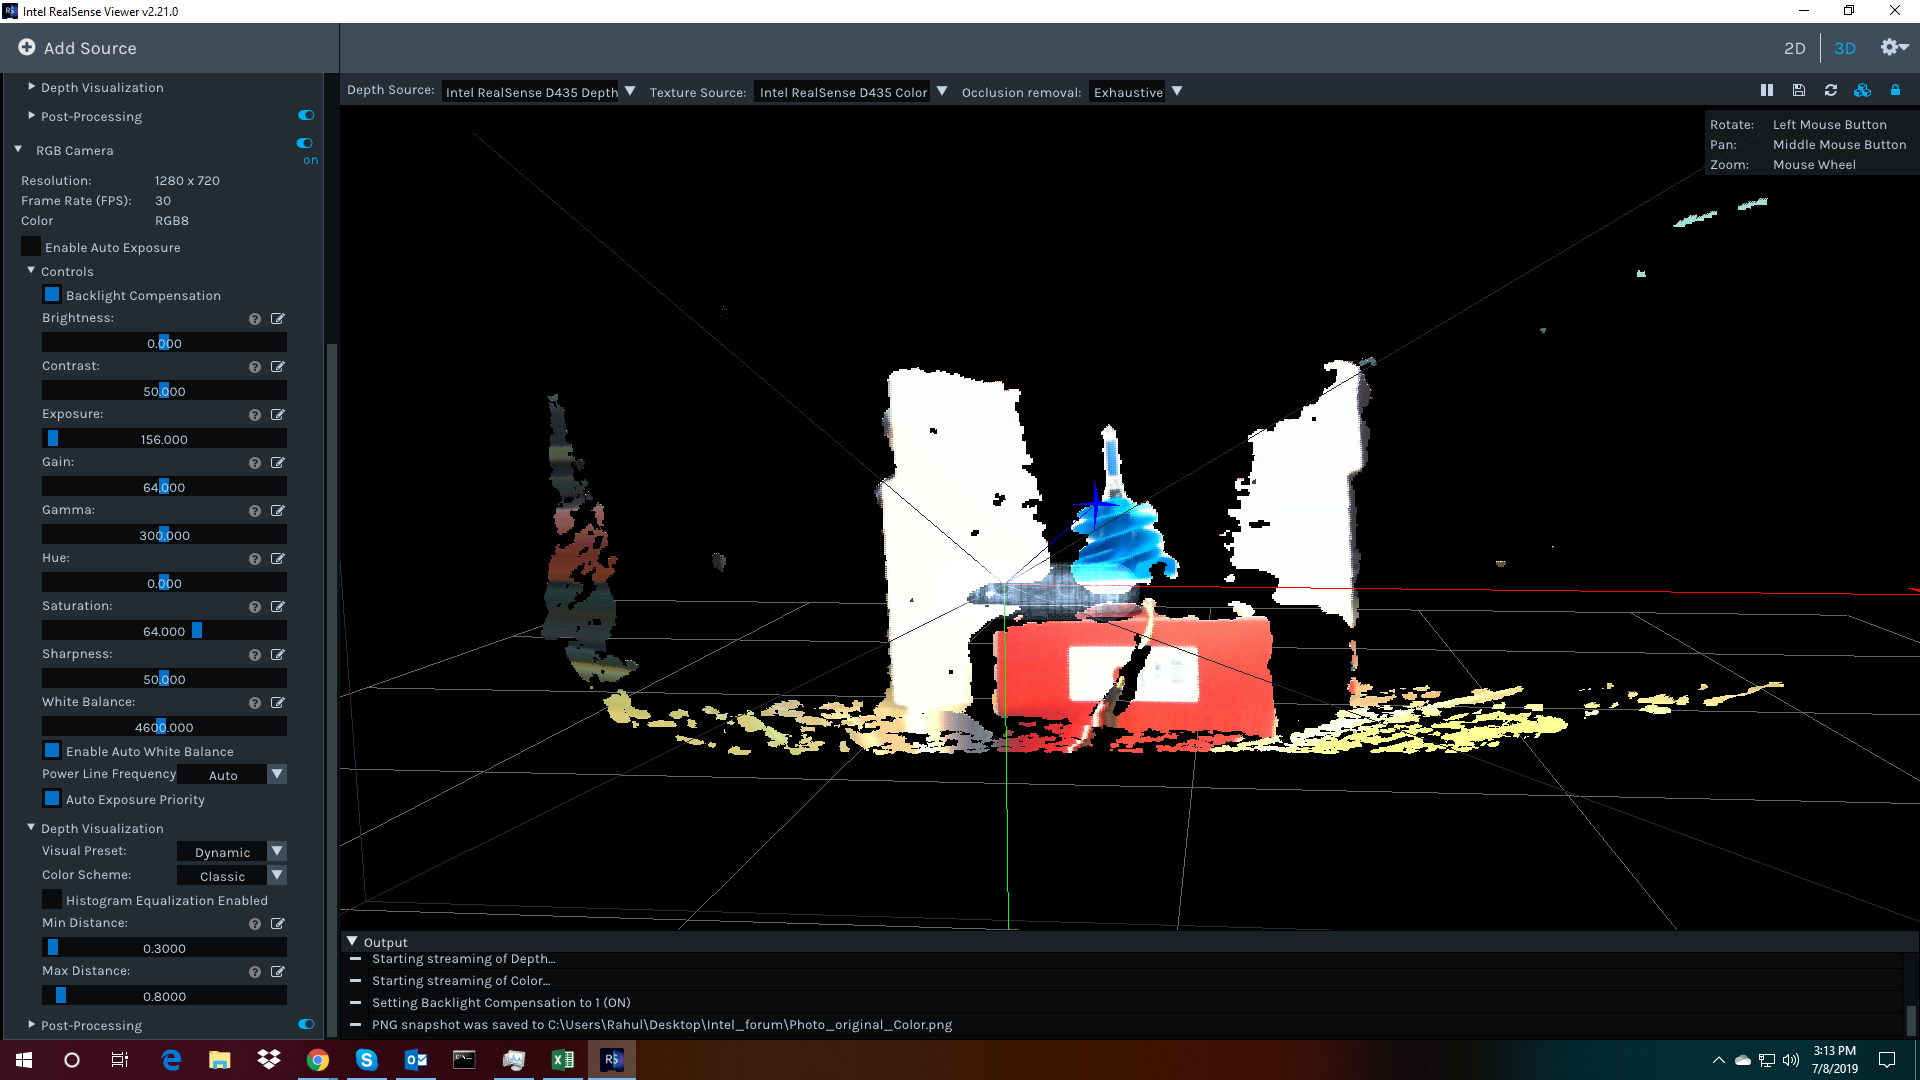
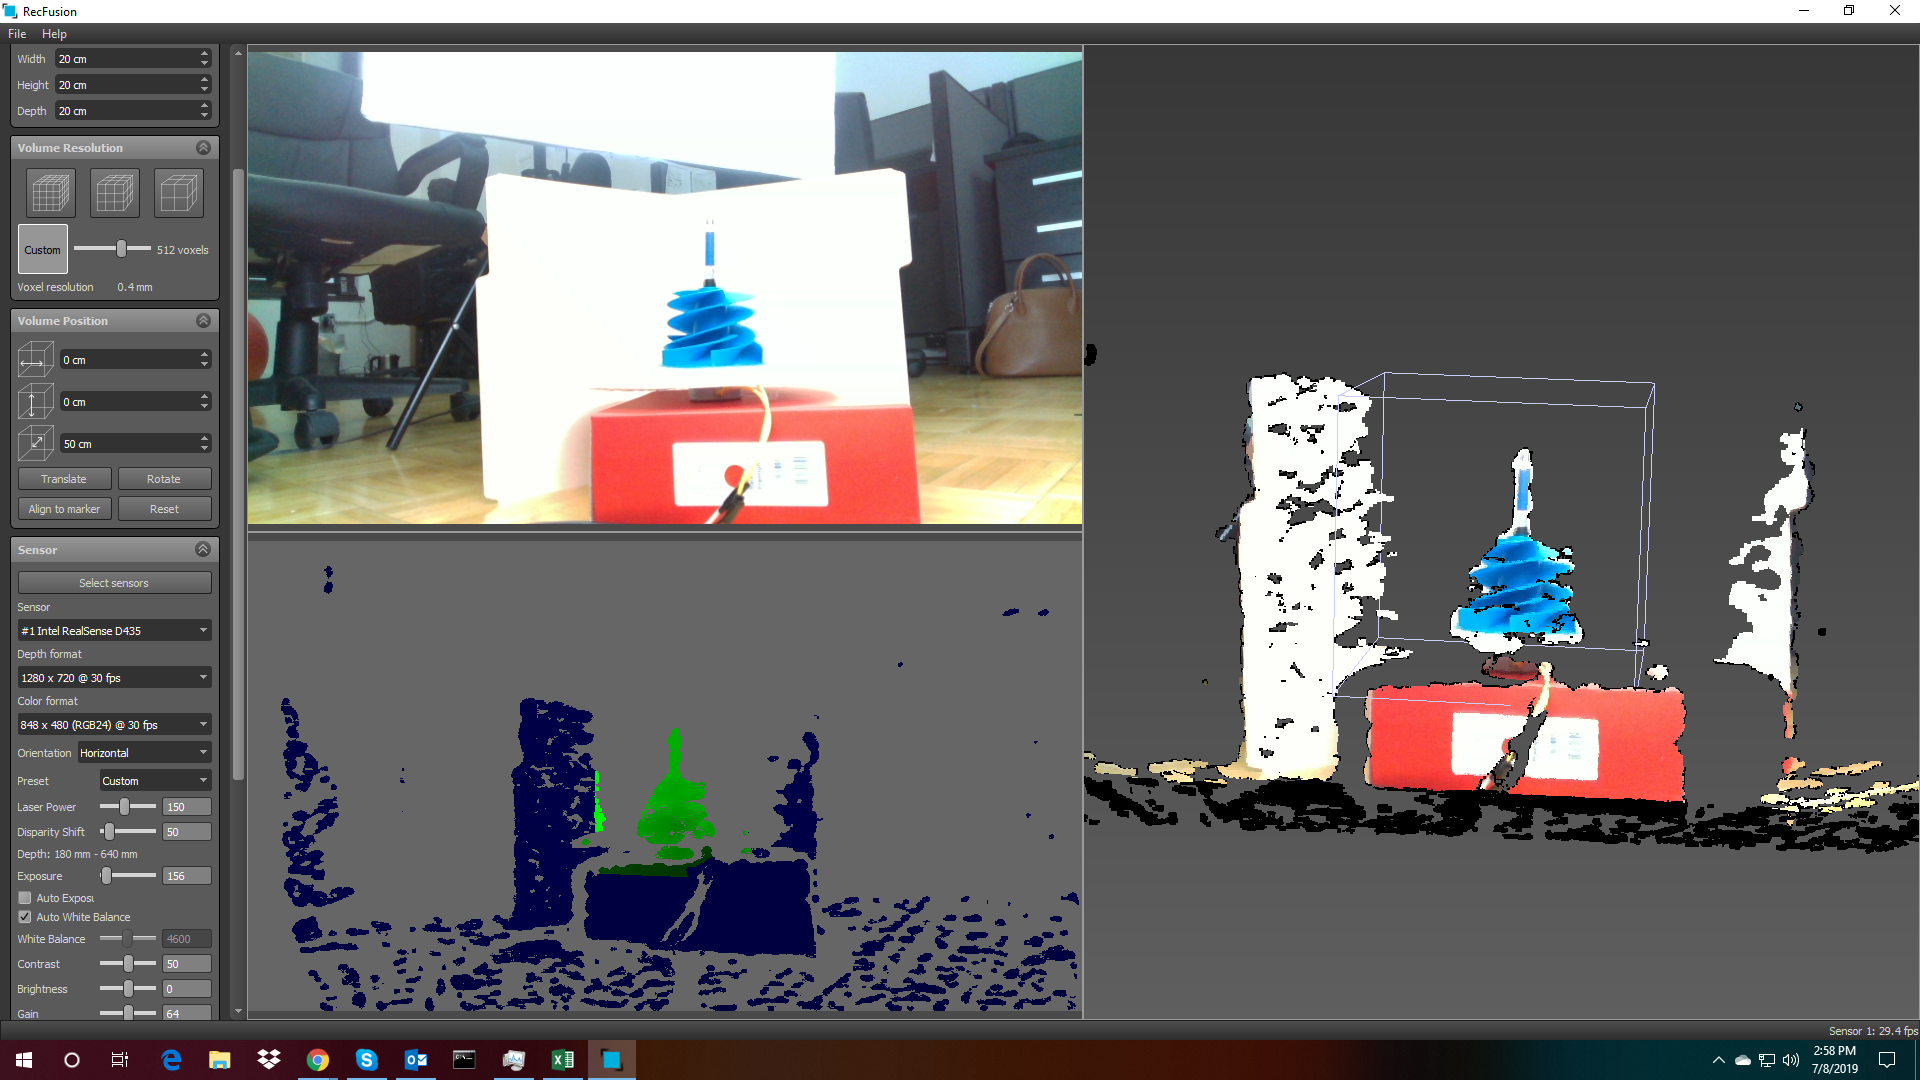
One more thing: is there any object size and feature limitations because the object which I'm scanning is a small fan with many edges, and it's not able to recognise the depth between the blades. I have also attached object photos from RecFusion and Intel RealSense Viewer for your reference.
Original object: (in blue)
Intel RealSense:
RecFusion:
-
As long as you can fit a whole object into the camera's view then it should be scannable. The quality of the scan can depend on a range of factors though. These include:
* The depth image may be degraded or missing when scanning reflective surfaces. A way to dampen reflections is to coat the object with a fine powder such as foot powder or baby powder, or use a professional 3D scanning aerosol spray product.
* Generally, a depth camera should find it easier to lock onto and read the detail on a complex object with many shapes and edges, rather than a more simplistic object such as a sphere.
In order to get greater accuracy from close-range scanning, you could try minimizing the 'depth units' scale of the camera. This can be done in RealSense Viewer by going to the 'Depth Units' slider option under Controls and sliding it down as far as it will go, to '0.0001'
-
Hi,
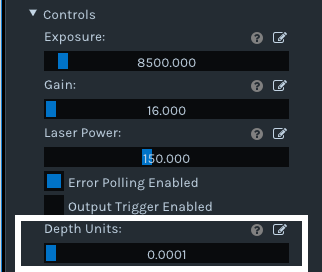
Thank you for the comments. As per your suggestion, I replaced the D435 with D415 and the results are better. But still, I needed to tune the depth control parameters given in the Advanced Controls section, such as those (given in the pic below):
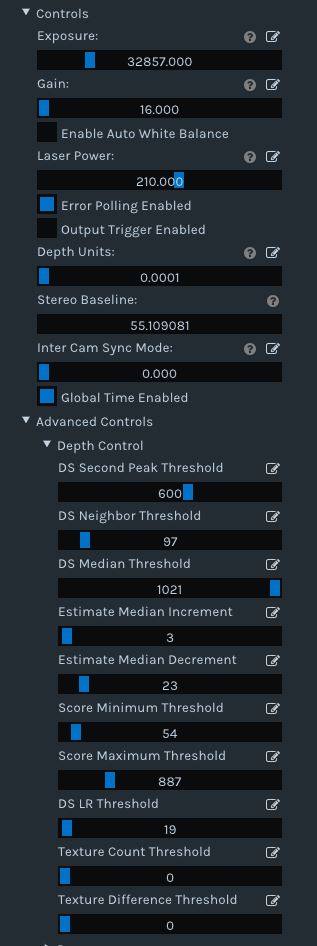
Some of the controls which I have experimented on are: Disparity Shift, laser Power, exposure. It would be really great if you could provide an explanation of the above controls so that I could tune them appropriately for scanning a small object (bounded by ~10-15cm).
Thank you!
-
Most of the Advanced Mode controls are not documented by Intel. This is because they interact with each other in complex ways and so Intel chose to control them automatically with machine-learning instead of providing documentation for them. You are welcome to do trial and error experiment with the values through and see how they affect the image.
Intel offers Visual Presets instead to provide a range of pre-made configurations for different balance of aspects to prioritize, such as High Accuracy.
https://github.com/IntelRealSense/librealsense/wiki/D400-Series-Visual-Presets
The 'Depth Unit' setting affects how the accuracy of the camera performs at very close range. The smaller the depth units, the better the accuracy when the camera is very close to an object.
Inter Cam Sync Mode can be ignored if you are not synchronizing multiple cameras together.
Laser Power affects the visibility of the semi-random pattern of dots that the IR projector of a camera can overlay onto the objects in a location. the lower the Laser Power value, the less visible the dot pattern is. The dots help the camera to read texture on flat, low-feature objects such as walls and doors and so get better-quality depth readings from them. If you are using the camera in a location with bright light then it may not be necessary to have the projector enabled, since the camera can use ambient light instead.
If the light is bright, you could also manually reduce exposure to around 1 ms, which can also help to reduce motion artifacts in the image.
Turning the emitter off to remove the dot pattern may reduce by around 30% the 'RMS error' (inaccuracy in the depth readings from the camera that increase as the distance of an object from the camera increases), according to Intel's excellent illustrated camera tuning guide.
RMS should not be something that really affects you though, since the error is near zero when the camera is right up against an object it is observing.
Here is a link to the tuning guide.
Increasing the Disparity Shift will reduce the minimum distance of the camera so that it can get closer to an object before minimum distance (MinZ) is reached and the image starts breaking up. Maximum depth sensing distance (MaxZ) will decrease at the same time, but this may not matter if you are doing very close range scanning.
Please sign in to leave a comment.
Comments
5 comments