How to measure the dimensions (length, width, height) of an object using RealSense D435i?
Hello,
I am working on a project using the Intel RealSense D435i camera, and I would like to measure the physical dimensions (length, width, and height) of objects placed in front of the camera.
I’m using the RealSense SDK 2.0 and working in [C++].
Could someone please explain the best approach or provide an example of how to:
-
Detect the object
-
Measure its dimensions (in real-world units, such as centimeters or meters)
I have seen some references to point clouds and depth frames, but I’m not sure how to extract accurate size measurements from them.
Thank you in advance.
-
Hi Damiatamani456 The RealSense SDK has a C++ example program called rs-measure that can measure between two points on the image, instead of between the camera and a point.
https://github.com/IntelRealSense/librealsense/tree/master/examples/measure
The RealSense Viewer tool also has a measuring function built in. It can be found by entering the Viewer's 3D point cloud mode and clicking on the Measure option that is at the top of the Viewer window in this mode. The Viewer's measure mode allows the selection of multiple points on the image, enabling you to determine volume by measuring length, width and height.
-
Hi MartyG,
Thank you very much for your helpful response! I checked the
rs-measureexample and the RealSense Viewer tool as you suggested — they’re very useful for understanding the basics of measuring distances.I just have a follow-up question to make sure I’m approaching this correctly:
Should I first detect the object in the image before trying to measure its dimensions?
And if that’s the case, would the object detection step typically involve using some kind of AI or machine learning model (for example, using a neural network or OpenCV with classical detection methods)?
Or is there a simpler recommended approach for detecting and isolating the object before measuring?
Thanks again for your guidance!
-
If you are manually selecting points to measure between then there is no need to detect the object.
The Python-based RealSense TensorFlow wrapper provides tutorial examples of automatically detecting from the RGB image and measuring the height of the detected recognized object (a human in the tutorial).
https://github.com/IntelRealSense/librealsense/tree/master/wrappers/tensorflow
The RealSense SDK also has a Python automatic volume measuring tool called box_dimensioner_multicam
The SDK also has a C++ and OpenCV example for detecting from an RGB image, though it measures the distance of the recognized object rather than its dimensions.
https://github.com/IntelRealSense/librealsense/tree/master/wrappers/opencv/dnn
-
Thanks again for your support. Based on your suggestions, I'm now working on a project where I aim to measure the physical dimensions (length, width, height) of electronic components using the RealSense D435i, and store both:
-
An image dataset (RGB + depth) of the components
-
A corresponding dimension dataset (in real-world units)
My goal is to create a small-scale inspection system or training dataset for machine learning purposes.
I have a few questions to make sure I’m setting things up correctly:
-
Would you recommend using the tool as a base for this use case (electronic parts, usually small, flat or 3D components)?
box_dimensioner_multicam -
What’s the best practice to ensure accurate and repeatable measurements for small objects like resistors, capacitors, or ICs? Should I:
-
Calibrate the camera for close-range depth sensing?
-
Use any external markers or background?
-
-
Do you recommend taking multiple measurements (angles/views) per component, or is a single top-down view sufficient if the component is well placed?
-
Finally, are there any known limitations of the D435i for small object measurement that I should be aware of?
Thanks a lot in advance — this project will greatly benefit from your insight.
-
-
1. As the program name suggests, box_dimensioner_multicam is suited to the measuring of square / rectangular boxes. The camera should ideally be around 1 meter away from the observed object when using this particular program, so it would not be suited to small components.
2. The camera should be able to pick up flat-ish square or rectangular microchips. It might be able to pick up capacitors and resistors, but not very small, thin wires protruding from those components.
If the components are black colored though then the camera is unlikely to see them, as it is a general physics principle (not specific to RealSense ) that dark gray / black color shades absorb light. Casting a strong light source onto black objects / surfaces can help to bring out depth detail from them though.
You could use a setting called Disparity Shift to reduce the minimum distance of the camera and allow it to depth-sense at closer range by enabling the camera to be closer to the object. With a D435i though there will be a physical limit of about 7 cm before the camera's depth sensing starts getting confused.
The D405 camera model is specially designed for high quality, high accuracy depth sensing and has an ideal depth range of 7 cm to 50 cm. With Disparity Shift you can get the D405 camera within 4 cm of the object.
It may be worthwhile to have a textured background under the components to help the camera to differentiate between the component (foreground) and under-surface (background). A grainy background image that could be printed out onto a sheet of paper can be downloaded here:
3. A single top-down view should be sufficient for small components that are not very high. You would only need to take multiple views for large, wide objects that the camera could not see all sides of with a single viewpoint.
4. D435i is good for close range depth sensing of small objects because of its low minimum distance that enables the camera to get closer to objects than other models in the RealSense 400 Series range, except for D405 which can get closer.
A limitation of D405 is that it is not equipped with an infrared pattern projector component, so it will have more difficulty than a D435i in depth-sensing objects that have plain surfaces with low texture detail or no texture.
-
Thank you very much for your detailed and informative response — it really helped me understand the limitations and possibilities of the D435i.
I just wanted to clarify something:
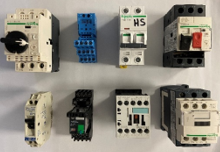
I made a small mistake in my previous explanation. The components I’m working with are not electronic components (like microchips, resistors, etc.), but rather electrical components, such as connectors, sockets, switches, or similar larger parts.Also, the background I’m using is purple-colored, which I chose specifically to create contrast and help separate the object from the background during detection and measurement.
Given this corrected context, do you think the D435i is still a good choice, or would another model (like the D405) be better for more accurate measurements?
Thanks again for your time and support!
-
Larger parts such as connectors, sockets and switches will be fine for a D435i. Such parts that typically have plain surfaces will also benefit from the D435i's infrared pattern projector component, which projects an invisible pattern of dots onto surfaces that makes it easier for the camera to analyze plain objects for depth information.
-
I have a quick follow-up question:
You mentioned that the D435i has an infrared pattern projector that helps with analyzing plain surfaces.Could you please explain how I can enable or use this projector in my application (using the RealSense SDK 2.0 with C++)?
Is it automatically enabled, or do I need to configure it manually through settings or code? -
I believe that the emitter should be enabled by default. If you want to make certain that it is then the C++ code below will enable it.
rs2::pipeline pipe;
rs2::pipeline_profile selection = pipe.start();


rs2::device selected_device = selection.get_device();
auto depth_sensor = selected_device.first<rs2::depth_sensor>();

if (depth_sensor.supports(RS2_OPTION_EMITTER_ENABLED))
{
    depth_sensor.set_option(RS2_OPTION_EMITTER_ENABLED, 1.f); // Enable emitter
}
Please sign in to leave a comment.
Comments
9 comments