Retrieving World Coordinates from Image Frame Intel Realsense D415
Hi, I was wondering if there is a built in function in the RealSense library that can retrieve the millimeter values from an image taken with the D415. I know that we can retrieve depth from the camera, but I am using this for an application where we need to track the motion of an object.
I've tried external approaches to this like Aruco and PnP, but if there was a convenient function that could give measurements internally, that would really help.
A description of the setup, we are using the camera to track very fine motions of a point of interest 500mm away from the camera, with deviations about 1-2cm in x and y with respect to the camera (z being in the camera axis). I know how to retrieve the z-deviation, I want to know if there was a way to retrieve the x and y as well.
Can someone please help with this?
Thanks!
-Kenneth
-
Hi Kvuong You could generate a 3D pointcloud representing the real-world scene using the pc.calculate instruction and then obtain x, y and z coordinates using the points.get_vertices instruction. The link below has an example of a script for doing so in Python.
https://github.com/IntelRealSense/librealsense/issues/4612#issuecomment-566864616
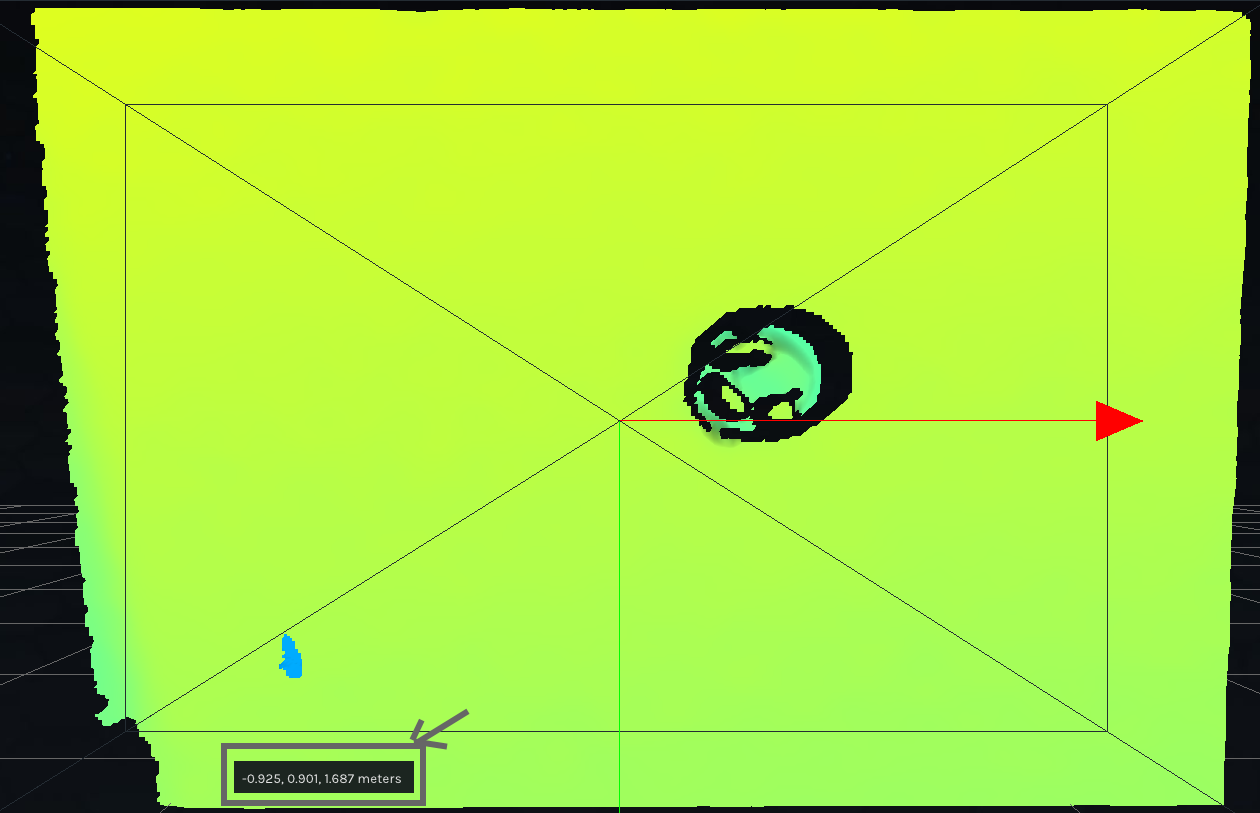
Alternatively, you could use the RealSense Viewer tool in its 3D pointcloud mode and hover the mouse cursor over a coordinate on the cloud to display its xyz coordinate in real-world meters beside the cursor.
-
I see on the realsense website link here that we can use the
rs2_deproject_pixel_to_point(...)to retrieve the 3D point location in the camera's associated 3D coordinate space. How is this different than the method that you recommend? Are there performance differences?To give further context on the experiment run, our team is tracking several markers in the image frame using AI. While distortion in the camera might not make a difference, I am curious if the main difference between the deproject function and the get vertices function operate differently in terms of being passed a distorted image or not. Can you describe the difference between the two please? Not solely on distortion, but performance and other things you might think of please.
Thanks!
-
Do you expect that we need to preprocess the photos before using the functions? I was looking at a separate openCV module like this one. OpenCV: Camera Calibration
-
rs2_deproject_pixel_to_point is a valid alternative method to pc.calculate and points.get_vertices.for obtaining real-world XYZ coordinates but it is typically more complicated to implement.
If depth and RGB color are being used then they first have to be aligned with the align_to instruction before afterwards performing rs2_deproject_pixel_to_point, whilst with the pc.calculate method depth and color can be aligned together simply with the map_to instruction that maps the depth and color images together.
Using points.get_vertices is also more accurate than rs2_deproject_pixel_to_point by a small amount due to error that can be introduced by the align_to alignment. Both methods of obtaining the XYZ coordinates should have similar performance though.
A third method is to use the rs2_project_color_pixel_to_depth_pixel instruction to convert a single specific 2D color pixel to a 3D depth pixel instead of aligning the entire image, which is more processing-efficient.
In regard to OpenCV, a RealSense user who once used the undistort function to remove the RealSense distortion model from an image reported that it made little difference to the image in their particular case. You are of course free to experiment with it yourself though to see what difference it makes to your own project.
-
I understand, thanks for the input! In my case, we will be using AI to track a marker and return a specific pixel coordinate that we can to retrieve the XYZ coordinates from. We will be running the AI model on the RGB image, so it makes sense for us to align it.
Three things:
1. I am currently trying to do so with the code below, but I can only read 0 values when I print out the vertices. Am I doing something wrong in how I align the frames or is it something else? I tried to follow the get_vertices Python example you provided earlier.
2. Is the get_vertices method compatible with aligning the frames? Also, I am using a D415 camera, is the rs2_deproject_pixel_to_point compatible with this camera?
3. To make sure I understand this properly, the rs2_project_color_pixel_to_depth_pixel instruction allows us to retrieve the XYZ of a a single point in the color frame to XYZ without using the align_to instruction? If so, I think this is the method I want to go with.
import pyrealsense2 as rs
import cv2
import numpy as np

#--------------------------------------------------------------------------------------------- DEFINING THE VIDEO PARAMETERS --------------------------------------------------#

color_res = [1280, 720]

depth_res = [1280, 720]

fps = 30

pipe = rs.pipeline()

cfg = rs.config()

pc = rs.pointcloud()

cfg.enable_stream(rs.stream.color, color_res[0],color_res[1], rs.format.bgr8, fps)

cfg.enable_stream(rs.stream.depth, depth_res[0], depth_res[1], rs.format.z16, fps)

profile = pipe.start(cfg)

depth_sensor = profile.get_device().first_depth_sensor()

if depth_sensor.supports(rs.option.depth_units):

    depth_sensor.set_option(rs.option.depth_units,0.0001)

align_to = rs.stream.color

align = rs.align(align_to)

color_path = 'rgblensextraction1.avi'

depth_path = 'depthlensextraction1.avi'

colorwriter = cv2.VideoWriter(color_path, cv2.VideoWriter_fourcc(*'XVID'), fps, (color_res[0],color_res[1]), 1)

depthwriter = cv2.VideoWriter(depth_path, cv2.VideoWriter_fourcc(*'XVID'), fps, (depth_res[0],depth_res[1]), 1)

while True:

    #Aligning depth and color frames

    frame = pipe.wait_for_frames()

    aligned_frames = align.process(frame)

    depth_frame = aligned_frames.get_depth_frame()

    color_frame = aligned_frames.get_color_frame()

    #Validate that both frames are valid

    if not depth_frame or not color_frame:

        continue

    #Defining depth_image

    depth_image = np.asanyarray(depth_frame.get_data())

    color_image = np.asanyarray(color_frame.get_data())

    depth_cm = cv2.applyColorMap(cv2.convertScaleAbs(depth_image, alpha = 0.03), cv2.COLORMAP_JET)

    pc.map_to(color_frame)

    points = pc.calculate(depth_frame)

    vtx = np.asanyarray(points.get_vertices())

    #writing out to video

    colorwriter.write(color_image)

    depthwriter.write(depth_cm)

    #Show stream

    cv2.imshow('rgb', color_image)

    cv2.imshow('depth', depth_cm)

    if cv2.waitKey(1) == ord('q'):

        break

colorwriter.release()

depthwriter.release()

pipe.stop()

# print(type(points), points)

print(type(vtx), vtx.shape, vtx)
-
1. I cannot see any obvious problems in your code. In a case at the link below where zeroes are returned, it is suggested that this may occur because of how numpy summarizes when printing large arrays, and that converting the array to a list before printing it may help.
https://github.com/IntelRealSense/librealsense/issues/3631
2. Some RealSense users do mix the align_to and pc.map_to alignment methods together successfully in the same script. If I were printing the vertices that were produced by the pc.calculate pointcloud then my personal preference would be to leave align_to out and just use map_to. It is up to the individual to decide what they feel works best for their particular project.
Yes, rs2_deproject_pixel_to_point is compatible with D415 and all other RealSense 400 Series camera models.
3. I recall that some RealSense users have reported that rs2_project_color_pixel_to_depth_pixel only returns the depth value and not the X and Y too. So it may not be suitable for your needs after all.
-
Hi Marty, I understand. Here are some updates.
1. I converted the numpy array into a list and I get some output now. However I get big blocks of points that have values then big block of just (0,0,0), is this because the camera cannot sense at those distances? My background isn't more than 10m, so I don't think that it should be the case, unless the get_vertices option only works in specific distances?
2. I understand, I did mix the align_to and map_to options when I didn't realize that they might have an affect on eachother. What's the harm in doing so? I do want to map between the two frames so that I can use image recognition on the RGB frame and then choose a pixel in the depth frame, can this be done only with map_to?
Thanks,
Kenneth
-
Finding this previous github ticket, it seems that they used align_to and map_to for pc.calculate. Can you please explain why it's alright to bypass the align_to method then? Pointcloud: comparing deprojected points vs points.get_vertices() · Issue #4315 · IntelRealSense/librealsense · GitHub
Thanks!
-
1. Whilst a D415 can depth-sense up to 10 meters, depth value accuracy starts to reduce noticably for distances more than 3 meters away. This phenomenon of accuracy reducing as distance from the camera increases is called RMS Error.
You could try increasing the Laser Power option to its maximum value of '360' to see whether it enhances your results. Increasing Laser Power to maximum will improve the camera's ability to read and analyze the invisible infrared dot pattern projected onto surfaces in the real-world scene. The camera uses these dots to help it to calculate depth values for surfaces.
2. If you align the image first with align_to and then use map_to afterwards, there is the possibility that you could be aligning depth and color twice using different alignment methods and introduce some alignment inaccuracy in doing so.
As map_to is a 3D point cloud option, if you only need to align 2D depth and color images then using only align_to would be the appropriate method, like in the rs-align example program for C++ or align_depth2color.py for Python.
-
1. I see, I've set the power to 360 and I'll do some tests to determine if it's better.
2. To explain my setup. I will be passed a pixel coordinate (u,w) from a model which analyzes the rgb image. From there I want to retrieve the xyz position, for this then, do I just need to do map_to? If so, do I just delete all the align_to lines of code? An example would be helpful.
Here is my current code, I've revised it to match the example that I've sent you previously:
import pyrealsense2 as rs

import cv2

import numpy as np

import random

import library as lib

#--------------------------------------------------------------------------------------------- DEFINING THE VIDEO PARAMETERS --------------------------------------------------#

color_res = [1280, 720]

depth_res = [1280, 720]

fps = 30

pipe = rs.pipeline()

cfg = rs.config()

pc = rs.pointcloud()

colorizer = rs.colorizer()

cfg.enable_stream(rs.stream.color, color_res[0],color_res[1], rs.format.bgr8, fps)

cfg.enable_stream(rs.stream.depth, depth_res[0], depth_res[1], rs.format.z16, fps)

profile = pipe.start(cfg)

depth_sensor = profile.get_device().first_depth_sensor()

#Controlling Depth Sensor Options

if depth_sensor.supports(rs.option.depth_units):

    depth_sensor.set_option(rs.option.depth_units,0.0001)

depth_sensor.set_option(rs.option.laser_power, 360)

align_to = rs.stream.color

align = rs.align(align_to)

color_path = 'rgblensextraction1.avi'

depth_path = 'depthlensextraction1.avi'

colorwriter = cv2.VideoWriter(color_path, cv2.VideoWriter_fourcc(*'XVID'), fps, (color_res[0],color_res[1]), 1)

depthwriter = cv2.VideoWriter(depth_path, cv2.VideoWriter_fourcc(*'XVID'), fps, (depth_res[0],depth_res[1]), 1)

while True:

    #Aligning depth and color frames

    frame = pipe.wait_for_frames()

    aligned_frames = align.process(frame)

    depth_frame = aligned_frames.get_depth_frame()

    color_frame = aligned_frames.get_color_frame()

    #Validate that both frames are valid

    if not depth_frame or not color_frame:

        continue

    #Defining depth_image

    depth_image = np.asanyarray(depth_frame.get_data())

    color_image = np.asanyarray(color_frame.get_data())

    depth_cm = np.asanyarray(colorizer.colorize(depth_frame).get_data())

    #writing out to video

    colorwriter.write(color_image)

    depthwriter.write(depth_cm)

    #Show stream

    cv2.imshow('rgb', color_image)

    cv2.imshow('depth', depth_cm)

    key = cv2.waitKey(1)

    #mapping point cloud to color frame and calculating the depth frame

    pts = pc.calculate(depth_frame)

    pc.map_to(color_frame)

    if key == ord('d'):

        min_distance = 1e-6

        vtx = pts.get_vertices()

        vertices = np.asanyarray(vtx).view(np.float32).reshape(-1,3) #Reshaping for xyz

        h,w,_ = color_image.shape

        rw_cords=[]

        counter = 0

        for i in range(pts.size()):

            rw_cords.append(vertices[i])

        print("Number of pixels ignored:", counter)

        pos = lib.pass_coordinate(depth_res[0]/2,depth_res[1]/2,depth_res[0])

        print("SDK point:",

                "index =", pos,

                "x =", rw_cords[pos][0],

                "y =", rw_cords[pos][1],

                "z =", rw_cords[pos][2]

                )

    if key == ord('q'):

        break

colorwriter.release()

depthwriter.release()

pipe.stop() -
Hi Marty, I think I might've figured out the alignment, but now I run into a separate issue.
I've read implementation on Keep(), mainly the ones below:
Can't get more than 15 frames · Issue #946 · IntelRealSense/librealsense · GitHub.
Calling keep() produces memory leak in Python · Issue #3164 · IntelRealSense/librealsense · GitHub
But I cannot find any implementation of Python keep() functions that would work for me. Can you provide an example of how to use the keep() method with respect to my code? Or at least, I want to just save the coordinates that pc.calculate() and pc.get_vertices() output, but I am also limited to the 15 frame cap another user ran into.
-
Hi Marty, I've found a workaround that lets me record videos for an extended period of time by writing the output out to a separate .txt file. However, I've found a different problem in the code in that my video recorded is at a different speed when I use the get.vertices() method. I assume that it takes the computer processing time to calculate the vertices that is longer than 1/30th of a second, so that frames are being recorded at a faster rate than the while loop iterates. Do you know why this is?
import pyrealsense2 as rs

import cv2

import numpy as np

import library as lib

import matplotlib as plt

import os, psutil

#--------------------------------------------------------------------------------------------- DEFINING THE VIDEO PARAMETERS --------------------------------------------------#

color_res = [1280, 720]

depth_res = [1280, 720]

fps = 30

pipe = rs.pipeline()

cfg = rs.config()

pc = rs.pointcloud()

df = rs.decimation_filter()

colorizer = rs.colorizer()

cfg.enable_stream(rs.stream.color, color_res[0],color_res[1], rs.format.bgr8, fps)

cfg.enable_stream(rs.stream.depth, depth_res[0], depth_res[1], rs.format.z16, fps)

color_path = 'color_person1_bigtag.avi'

depth_path = 'depth_person1_bigtag.avi'

colorwriter = cv2.VideoWriter(color_path, cv2.VideoWriter_fourcc(*'XVID'), fps, (color_res[0],color_res[1]), 1)

depthwriter = cv2.VideoWriter(depth_path, cv2.VideoWriter_fourcc(*'XVID'), fps, (depth_res[0],depth_res[1]), 1)

profile = pipe.start(cfg)

depth_sensor = profile.get_device().first_depth_sensor()

#Controlling Depth Sensor Options

if depth_sensor.supports(rs.option.depth_units):

    depth_sensor.set_option(rs.option.depth_units,0.0001)

depth_sensor.set_option(rs.option.laser_power, 360)

align_to = rs.stream.color

align = rs.align(align_to)

file_path = 'person1_bigtag.txt' #your txt filename

if os.path.exists(file_path):

    with open(file_path, 'w') as f:

        f.write('')

    f.close()

min_distance = 1e-6

counter = 0

while True:

    #Aligning depth and color frames

    frame = pipe.wait_for_frames()

    aligned_frames = align.process(frame)

    aligned_depth_frame = aligned_frames.get_depth_frame()

    aligned_color_frame = aligned_frames.get_color_frame()


    #Validate that both frames are valid

    if not aligned_depth_frame or not aligned_color_frame:

        continue

    #Defining depth_image

    depth_image = np.asanyarray(aligned_depth_frame.get_data())

    color_image = np.asanyarray(aligned_color_frame.get_data())

    depth_cm = np.asanyarray(colorizer.colorize(aligned_depth_frame).get_data())

    #mapping point cloud to color frame and calculating the depth frame

    pts = pc.calculate(aligned_depth_frame)

    pc.map_to(aligned_color_frame)

    #writing out to video

    colorwriter.write(color_image)

    depthwriter.write(depth_cm)

    track = []

    vtx = pts.get_vertices() < ---- PROBLEM HERE

    vertices = np.asanyarray(vtx).view(np.float32).reshape(-1,3) #Reshaping for xyz

    counter += 1

    print('counter: ' + str(counter))

    length = lib.pass_coordinate(200, 200, depth_res[0])

    position = vertices[length]


    cv2.circle(color_image,(int(color_res[0]/2),int(color_res[1]/2)), 2, (0,0,255), -1)

    cv2.circle(depth_cm,(int(depth_res[0]/2),int(depth_res[1]/2)), 2, (0,0,255), -1)

    # #Show stream

    cv2.imshow('rgb', color_image)

    cv2.imshow('depth', depth_cm)

    key = cv2.waitKey(1)

    if key == ord('q'):

        break

colorwriter.release()

depthwriter.release()

pipe.stop() -
Hi Marty, trying that approach didn't change the results. I suspect that the calculate and map to functions are just taking too much processing time, is there a way to retrieve the XYZ coordinates of a single point without going through the calculate and map to functions? The objective being so that the program is not computationally intensive and won't cause a delay in the recording.
I also isolated the two functions to see whether they both add to the delay individually, which they do.
Thanks,
Kenneth -
As you are using Python, the only remaining option for improving computation may be to build the librealsense SDK from source code with CMake with the build flag -DBUILD_WITH_OPENMP=TRUE included in the CMake build instruction.
By default librealsense uses a single CPU core for processing. Including the OPENMP flag builds librealsense with support for utilizing multiple CPU cores when performing depth-color alignment.
-
The link below has instructions for building from source code on Windows.
https://github.com/IntelRealSense/librealsense/blob/master/doc/installation_windows.md
To build the Pyrealsense2 Python wrapper at the same time as librealsense, tick the BUILD_PYTHON_BINDINGS option on the CMake graphical interface.
If BUILD_WITH_OPENMP is not listed then try adding it to the list of build flags with the Add Entry button.
You can skip the Enabling metadata on Windows section of the instructions, as this can be done in the RealSense Viewer tool.
Please sign in to leave a comment.
Comments
19 comments